How to Check an AI-Generated SVG: Five Tests with Real Files
By Ashesh Dhakal, Founder, SVG AI
ai svg generatorsvg generatorcheck svgeditable svgsvg file
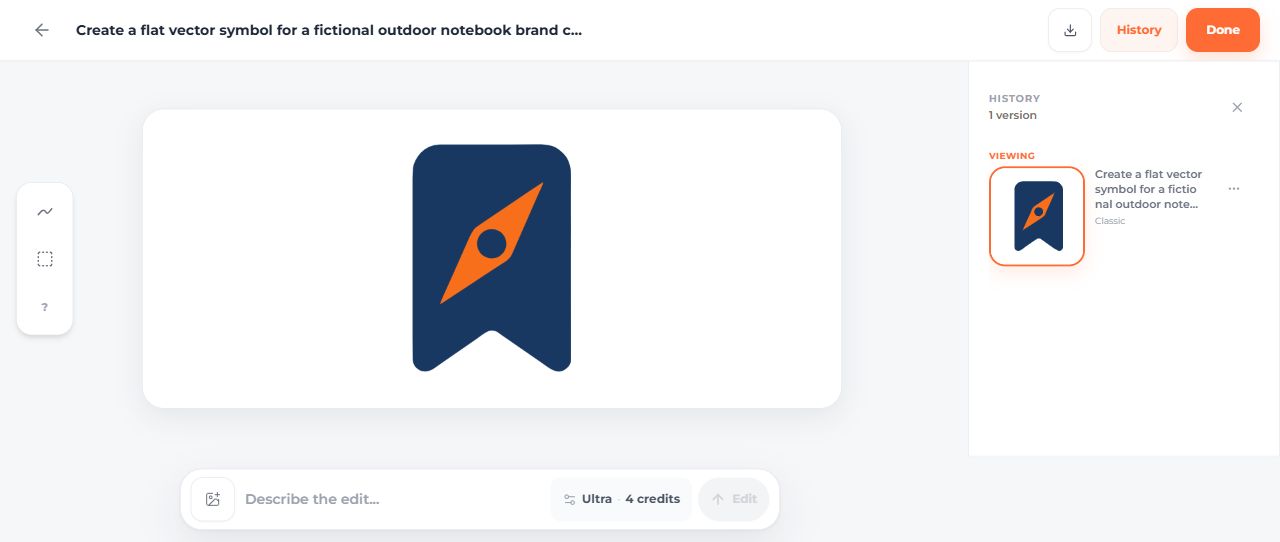
The Fieldnote mark looked like a simple navy bookmark with an orange compass. Opening the downloaded file revealed details that the preview alone could not answer: it contained three paths, its colors were close to the requested palette, and its aspect-ratio setting allowed stretching in a differently shaped box.
Here are five checks you can repeat with the same files. They connect a real AI SVG generator workflow to the result you will actually use in a website or design project.
The actual dashboard example
Fieldnote is a fictional outdoor notebook brand created for this walkthrough. On September 14, 2026, the dashboard settings were Classic, one SVG and transparent background. The displayed generation cost was two credits.
The exact prompt was:
Create a flat vector symbol for a fictional outdoor notebook brand called
Fieldnote. A dark navy rounded bookmark shape containing one simple orange
compass needle. Center it with generous padding. Use only navy #18345F and
orange #F97316. No lettering, no gradients, no shadows, no texture, no mockup.
Transparent background.
The result was downloaded from the dashboard before any manual changes. The files below preserve that original, a subsequent AI edit, and clearly labeled manual versions. Account conditions and available settings can change; use what your dashboard shows when you repeat the exercise.
1. Open and parse the complete file
Download fieldnote-original.svg and open it in a text editor. It is a complete XML document with an SVG namespace, viewBox and three path elements. The linked file is 2,552 bytes.

For a repeatable structural check, download inspect-svg.py, install Python if needed, and run it in the same folder:
python inspect-svg.py fieldnote-original.svg
The script reports this file's path, image and text counts, fills, viewBox and aspect-ratio setting. Parsing XML is one check. It does not certify visual quality, accessibility or safe handling of every possible SVG.
2. Check whether the artwork is paths or an image wrapper
The original has three paths and zero image elements. To make the distinction visible, the download set includes a manually constructed raster-wrapper control. That file places a PNG inside an SVG and has zero paths and one image element. It was assembled for this test, not generated by SVG AI.

python inspect-svg.py fieldnote-raster-wrapper-control.svg
Both filenames end in .svg; their contents are different. Look inside the file when editing individual shapes matters. SVG supports vector and mixed vector/raster content, as described in the W3C specification.
3. Compare the requested colors with the exported fills
| Part | Requested | Original file |
|---|---|---|
| Navy bookmark and center | #18345F | rgb(24,56,98) → #183862 |
| Orange needle | #F97316 | rgb(247,111,27) → #F76F1B |
The output follows the color direction without matching the exact values. If the design must use specific brand colors, inspect and set those values in the file rather than assuming the prompt enforced them.
The next dashboard edit requested:
Change only the orange compass needle to teal #0F766E. Keep the navy bookmark,
circular center, geometry, framing and size exactly unchanged. Keep the
transparent background.
The edit used Classic, at a displayed cost of two credits. The downloaded AI revision contains teal rgb(17,139,129) (#118B81), rather than #0F766E. Its navy becomes rgb(22,56,99) (#163863), and its path data and viewBox also change.

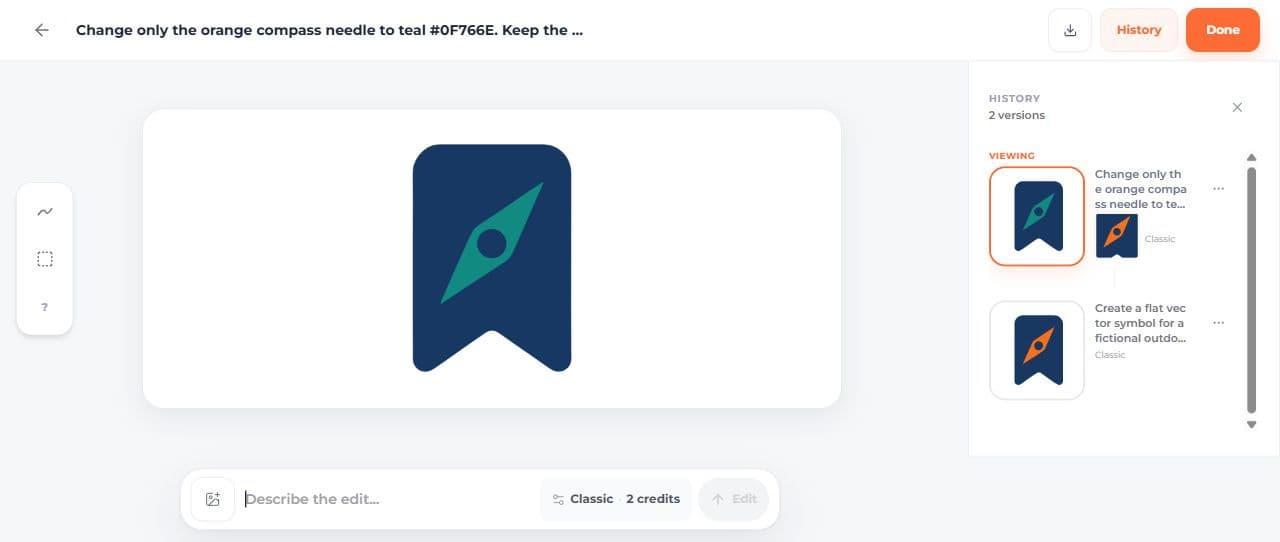
For an exact color change, the manual teal version starts from the original file, sets the requested colors and keeps every original path coordinate.

4. Put the SVG in a differently shaped container
The original includes preserveAspectRatio="none". In a wide fixed-size box, that permits the drawing to stretch. The manual files use preserveAspectRatio="xMidYMid meet", which fits the drawing proportionally in this example.
Open the working comparison page. Its wide-box panel gives both files the same CSS width and height so you can see the difference. MDN documents the aspect-ratio behavior.
For normal responsive placement, also check the container's dimensions. Do not change viewBox values at random to remove space: the values define the artwork's coordinate rectangle and can change its framing.
5. Inspect the size and background you will actually use
The comparison page renders each version at 16, 24, 32 and 128 pixels high, then places it on white and navy surfaces. Use these views to choose a size and background for the particular project. The navy part has little separation from the dark surface; a light surface or a deliberately prepared light variant is a better starting point there.
Do this check in the actual interface too. An icon next to a label, a standalone logo and a decorative illustration serve different purposes. A large clean-looking preview is not a substitute for the intended placement.
Download and reproduce the checks
| File | What it contains |
|---|---|
| Original generated SVG | The untouched dashboard download |
| AI teal revision | The actual follow-up result, including its other changes |
| Manual brand-color version | Exact requested navy/orange fills and proportional fitting |
| Manual teal version | Exact navy/teal fills, with original paths preserved |
| Raster-wrapper control | A manually assembled example containing a PNG |
| Inspection script | Structural checks for the supplied local files |
| File measurements | Exact bytes, hashes, element counts and attributes |
| Comparison page | Actual-size, background and aspect-ratio views |

Keep the original even when a manual variant becomes your final file. That makes it clear which changes came from generation, which came from an AI edit and which you applied yourself.
For the next step, the SVG file-format guide explains the structure in more detail. The editing guide covers choosing a revision method, and the first-SVG walkthrough helps you create an initial sample of your own.
For a quick in-browser preview before inspecting the file, follow the SVG code testing guide.