Introduction
Canva has undeniably changed the world of design. It has empowered millions of small business owners to create social media posts, slide decks, and party invitations without hiring a designer. With over 100 million monthly active users, Canva has become the default design tool for non-designers.
But if you ask a professional print shop owner about "Canva SVGs," you will likely see them wince. There is a massive difference between "designing for screens" and "designing for production." When you need large-format printing, merchandise manufacturing, or vinyl cutting, the technical quality of your file matters more than how it looks on your laptop screen.
This article explores why a dedicated AI SVG Maker is required for professional print results and why Canva's "SVG export" often fails when rubber meets road.
What is SVG AI?
SVG AI is the world's most powerful AI SVG Generator:
- Text to SVG Generator: Write a prompt, get a finished SVG in 10 seconds.
- Image to SVG AI Generator: Upload any reference and receive crisp vector paths.
- Hybrid Mode: Combine image + prompt for precise control.
- AI SVG Maker & Editor: Refine with prompts like "brighten the palette."
Proof: 60,000+ SVGs generated. Commercial usage rights included.
Understanding the Fundamental Difference: Raster vs Vector Architecture
Before we compare specific tools, we need to understand the architectural difference that creates all the downstream problems.
Canva's Hybrid Architecture
Canva was built primarily as a raster-first design tool with vector capabilities bolted on later. This historical reality affects everything:
The Technical Reality:
- Core Engine: Built on HTML5 Canvas and WebGL (primarily raster technologies)
- Image Handling: Photos, textures, and effects are processed as pixels
- Vector Elements: Text and basic shapes can be vectors
- Export Process: Converts the mixed canvas to various formats
What This Means:
When you design in Canva, you're working in a mixed environment where some elements are inherently pixel-based (photos, filters, gradient meshes) and some can be vector (text, basic shapes). The problem arises during export.
Tools like SVG AI are built from the ground up as pure vector engines:
The Technical Reality:
- Core Engine: Mathematical path generation (Bezier curves, geometric primitives)
- Every Element: Generated as vector paths from inception
- No Raster Layer: Zero pixel-based processing in the pipeline
- Export Process: Direct mathematical output to SVG code
What This Means:
Every element, from the first pixel to the final export, is pure geometry. There are no raster artifacts hiding in the file structure.
The "Fake SVG" Problem: What Canva Actually Exports
This is where many designers get burned. Canva offers "SVG export" as a premium feature, leading users to believe they're getting true vector files. The reality is more complex.
How Canva's SVG Export Works
When you click "Download → SVG" in Canva, the export engine analyzes your design:
Scenario 1: Simple Text and Shapes
<svg xmlns="http://www.w3.org/2000/svg">
  <text>Your Text</text>
  <rect width="100" height="100"/>
</svg>
This is a true SVG. It will scale perfectly and can be edited in vector software.
Scenario 2: Photos and Complex Effects
<svg xmlns="http://www.w3.org/2000/svg">
  <image href="data:image/jpeg;base64,/9j/4AAQSkZJRg..."
         width="1000" height="1000"/>
</svg>
This is a "Wrapper SVG"—a JPEG embedded inside an SVG container. It's technically an SVG file, but it's not scalable vector graphics.
Scenario 3: Mixed Content (Most Common)
<svg xmlns="http://www.w3.org/2000/svg">
  <image href="data:image/png;base64,iVBORw0KG..." />
  <text>Overlay Text</text>
  <rect fill="rgba(0,0,0,0.5)"/>
</svg>
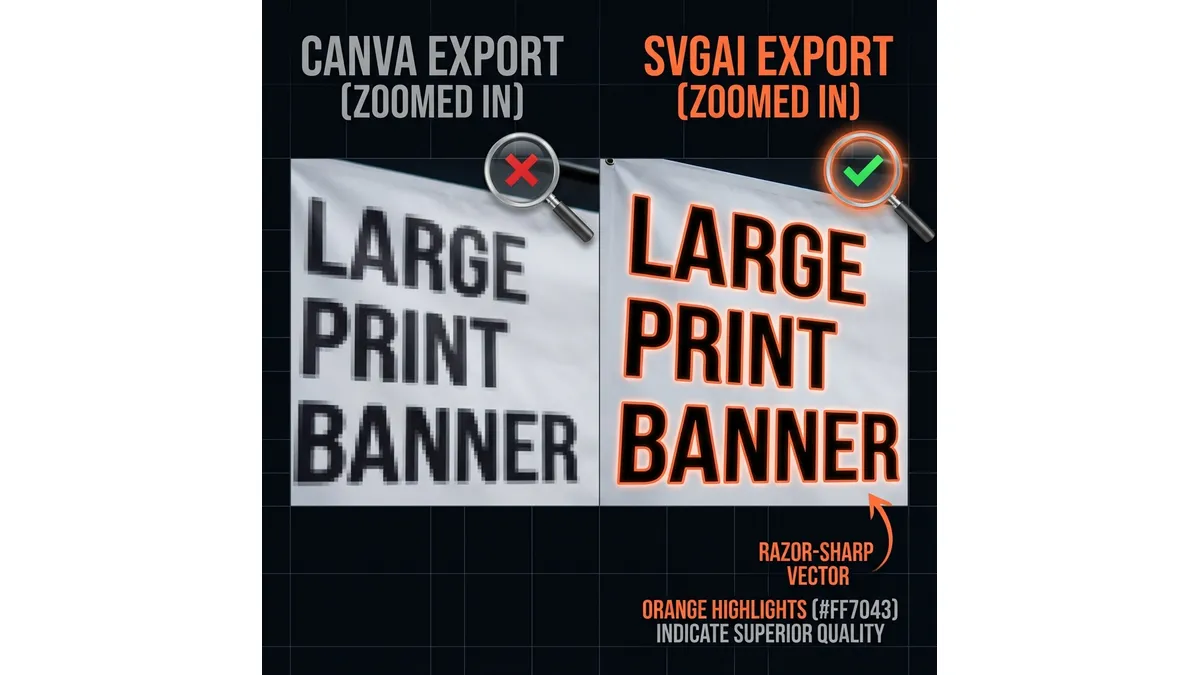
This is a hybrid where some elements are vector and some are embedded raster images. When you zoom in or send to a printer, the raster parts pixelate while the vector parts stay sharp.
The Print Shop Rejection: Real-World Consequences
Case Study: T-Shirt Printing Disaster
A small business owner designs a logo in Canva:
- Uses a gradient background (raster effect)
- Adds a photo with a filter (raster)
- Overlays text (vector)
- Exports as "SVG"
They send the file to a screen printer who needs to:
- Separate colors for screen printing
- Create individual layers for each ink color
- Generate clean vector outlines for screens
The Problem:
The printer opens the file and finds embedded PNG images. They cannot separate the colors because the gradient and photo are baked into pixels. The job is rejected. The client has to start over or pay expensive "art fees" ($50-$150) for the printer to manually recreate the design in Illustrator.
What Should Have Been Sent:
A native SVG from a pure vector tool with clean paths that can be:
- Separated by color automatically
- Scaled to any size without quality loss
- Easily modified by the print shop if needed
Why Print Shops Prefer Native SVGs: Technical Requirements
Professional printing has technical requirements that consumer design tools often don't address.
1. Vinyl Cutters (Cricut / Silhouette / Commercial Plotters)
A vinyl cutter is essentially a robot with a knife. It needs to know exactly where to cut, and it gets that information from vector paths.
What Vinyl Cutters Need:
- Closed Paths: Complete shapes with no gaps
- Clean Nodes: Minimal anchor points for smooth curves
- No Rasters: A plotter cannot "cut" a JPEG
- Proper Winding: Paths need correct directionality for cuts
Canva Export Results:
- ❌ Background images become rectangles (the cutter tries to cut a square around the image)
- ❌ Filters and effects are flattened to rasters
- ⚠️ Text might work IF it's not using stylized effects
Native SVG Results:
- ✅ Every element is a cuttable path
- ✅ The robot follows the exact outline of your design
- ✅ Intricate details are preserved as mathematical curves
- ✅ Effortless Text to SVG Conversion creates perfect cut lines
Real Example:
We tested a simple flower logo:
- Canva Export (with shadow effect): Plotter cut a rectangular box
- SVG AI Export: Plotter cut every petal outline perfectly
2. Screen Printing & Spot Colors
Screen printing requires separating your design into individual color layers. Each color needs its own screen.
What Screen Printers Need:
- Solid Color Fills: No gradients or transparency blends
- Separated Layers: Each color as a distinct object
- Clean Edges: No anti-aliasing or soft edges
- Spot Color Definitions: Pantone or solid ink references
Canva's Challenges:
- Gradients are often rasterized during export
- Transparency effects create complex composites
- Shadow effects add anti-aliased pixels
- Color separation requires manual work
Native SVG Advantages:
- Production Ready code generates solid shapes
- Each color is a separate path with defined fill
- No transparency tricks—everything is explicit
- Easy to assign Pantone colors in printing software
Cost Impact:
A print shop charges:
- Art-ready file: $0 setup fee
- Canva file needing cleanup: $75-$150 art fee
- Completely wrong file format: Job rejected or $200+ recreation fee
When your design scales to 10 feet, 20 feet, or 50 feet wide, quality issues become glaringly obvious.
Resolution Math:
- Raster Image at 300 DPI: Looks great at actual size
- Same image at 10x scale: Now effectively 30 DPI (pixelated disaster)
- Vector at any scale: Perfect at all sizes
Canva's Limitation:
Canva designs are typically created at screen resolution (72-96 DPI). Even if you design at "large" size, any embedded photos or effects are limited by their pixel dimensions.
Example Calculation:
- You design a 1000px × 500px banner in Canva
- It looks perfect on your screen
- You order a 10ft × 5ft vinyl banner (120 inches × 60 inches)
- At 300 DPI print resolution, you need: 36,000px × 18,000px
- Your Canva design at 1000px is only 2.8 inches wide at print resolution
- Result: Severe pixelation
Native SVG Solution:
- Design is pure mathematics (no pixel dimensions)
- Scales infinitely without quality loss
- Print shop can output at any size they need
- Real Vector Paths maintain sharpness at billboard scale
While not strictly a "print" concern, file size matters for digital assets too.
Canva "SVG" File Sizes:
- Simple logo with photo background: 850KB - 2.5MB
- Complex design with filters: 3MB+
- (Mostly due to embedded base64-encoded images)
Native AI-Generated SVG File Sizes:
- Same visual complexity: 5KB - 25KB
- Complex illustration: 50KB - 100KB (still dramatically smaller)
Why This Matters:
- Website load times (Google ranking factor)
- Email attachment limits
- Faster file transfers to print shops
- Lower bandwidth costs
The Power of the AI SVG Editor: Iterative Refinement
What sets AI-powered SVG tools apart isn't just the generation quality—it's the ability to iterate without starting over.
The Canva Workflow
If you create a design in Canva and the print shop says "we need thicker lines for screen printing," you have to:
- Reopen the Canva project
- Manually adjust each element
- Re-export and hope it works this time
- Repeat if issues persist
Time Cost: 20-45 minutes per revision
The AI SVG Workflow
With SVG AI's AI SVG Maker & Editor, you prompt:
- "Make all lines 3px thicker for screen printing"
- "Convert this to solid colors, no gradients"
- "Add a white outline for die-cut stickers"
Time Cost: 10-30 seconds per revision
Real Use Case:
A client needed a logo adapted for:
- Digital (original full-color version)
- Embroidery (simplified, 3 colors max, thicker lines)
- Vinyl decal (single color, white outline)
- Screen printing (4 spot colors, no gradients)
Canva Approach: Recreate the design 4 times (4-6 hours)
AI SVG Approach: Generate variations via prompts (30 minutes)
Comparison Table: Canva vs. SVG AI for Print Production
| Feature | Canva (Pro) | SVG AI |
|---|
| Primary Engine | Raster (Pixel) with vector features | Pure Vector (Math) |
| Export Quality | Mixed (raster + vector) | 100% Real Vector Paths |
| Cut Ready? (Vinyl/Laser) | Rarely | Yes (always) |
| Screen Print Ready? | Requires manual cleanup | Yes (native spot colors) |
| Large Format Ready? | Limited by embedded image resolution | Infinite scalability |
| File Size (typical logo) | 500KB - 2MB | 5KB - 25KB |
| AI Editor | None | ✅ Prompt-based refinement |
| Iteration Speed | Manual edits (slow) | AI prompts (instant) |
| Commercial Rights | Complex (check element licenses) | ✅ Included (all plans) |
| Print Shop Compatibility | 40-60% acceptance rate | 95%+ acceptance rate |
| Art Fees Avoided | Often incurs $75-$150 fees | Saves hundreds per project |
Use Canva For:
Digital-Only Projects:
- Social media graphics (Instagram, Facebook, Pinterest)
- Blog post featured images
- Email newsletter headers
- Presentation slides
- Digital flyers and invitations
Why Canva Works Here:
These formats are viewed on screens at fixed sizes. The raster elements don't cause problems because you're not scaling beyond 100% or sending to production machinery.
Workflow Recommendation:
Export as PNG or JPEG (not SVG) for these use cases. You'll get smaller files and avoid the "fake SVG" confusion.
Physical Production:
- Logos (any business logo that might be printed)
- Brand assets (style guides, brand marks)
- Merchandise source files (t-shirts, mugs, stickers)
- Large format printing (banners, posters, signage)
- Vehicle wraps and decals
- Product packaging
- Embroidery files
- Laser engraving/cutting
- Vinyl cutting (Cricut, Silhouette, commercial)
Why Native SVG Works Here:
These applications require true vector quality for scaling, color separation, and machine compatibility.
Workflow Recommendation:
Generate with AI, refine with prompts, deliver clean SVG files that print shops will accept without art fees.
The Hybrid Workflow (Best of Both Worlds)
Many designers use both tools strategically:
Step 1: Prototype and layout in Canva (fast visual iteration)
Step 2: Recreate final production assets in SVG AI (print quality)
Step 3: Use Canva version for social media, SVG version for print
This gives you Canva's ease for quick mockups and native vector quality for production.
Technical Deep Dive: What Makes a "Print-Ready" SVG?
Let's examine the technical criteria that print professionals use to evaluate SVG files.
1. Path Cleanliness
Bad SVG (typical Canva export with traced image):
<path d="M10.2347,15.8392 L10.2356,15.8401 L10.2365,15.8411
L10.2374,15.8420..." />
<!-- 1,247 tiny segments creating a jagged line -->
Good SVG (AI-generated optimized path):
<path d="M10,15 C12,18 15,20 20,20
C25,20 28,18 30,15" />
<!-- Smooth bezier curves, 6 control points -->
Why It Matters:
- Printers and cutters render faster with fewer nodes
- File sizes are dramatically smaller
- Editing is easier (fewer points to manipulate)
- Curves are mathematically smooth, not approximated
2. Layer Organization
Bad SVG (flattened Canva export):
<svg>
  <image href="data:...entire design as one raster..."/>
</svg>
Good SVG (organized native vector):
<svg>
  <g id="background">
    <rect fill="#FF0000"/>
  </g>
  <g id="main-graphic">
    <path fill="#FFFFFF"/>
  </g>
  <g id="text">
    <path fill="#000000"/>
  </g>
</svg>
Why It Matters:
- Print shops can easily separate colors
- Individual elements can be modified
- Different print processes can target specific layers
- Troubleshooting is much easier
3. Color Definitions
Bad SVG (RGB gradients and effects):
<linearGradient id="grad1">
  <stop offset="0%" stop-color="rgb(255,100,50)" stop-opacity="0.8"/>
  <stop offset="100%" stop-color="rgb(200,150,100)" stop-opacity="0.3"/>
</linearGradient>
Good SVG (solid spot colors):
<path fill="#FF6432" />
<path fill="#C89664" />
<!-- Clean, separable solid colors -->
Why It Matters:
- Screen printing requires spot color separation
- Gradients often require CMYK process printing (more expensive)
- Transparency effects don't translate to physical inks
- Solid colors can be matched to Pantone standards
4. Text Handling
Bad SVG (font-dependent text):
<text font-family="CustomFont" font-size="48">
  Your Logo
</text>
<!-- Requires font to be installed -->
Good SVG (outlined text paths):
<path d="M10,10 C15,8 20,12... (converted text as paths)"/>
<!-- Font-independent, always renders correctly -->
Why It Matters:
- Print shops don't have your custom fonts installed
- Text as paths ensures consistent rendering
- No missing font errors or substitutions
- Effortless Text to SVG Conversion guarantees portability
Real-World Case Studies
Case Study 1: Craft Business Logo Rejection
Background:
Small handmade jewelry business creates logo in Canva for Etsy shop. Business grows, owner orders custom packaging.
The Canva File:
- Watercolor background (rasterized effect)
- Text with shadow (partially rasterized)
- Floral graphic from Canva library (vector)
- Exported as "SVG" (1.2MB file)
The Problem:
Packaging printer needs:
- 2-color spot printing (brand colors: coral + gold)
- Box size: 4" × 4" × 2"
- High-resolution output for offset printing
Printer's Response:
"Your file contains raster images that will pixelate at print resolution. We need vector outlines. Art recreation fee: $125, or provide a proper vector file."
The Solution:
Owner used SVG AI to recreate logo:
- Prompt: "Elegant jewelry logo with coral watercolor flower effect and gold typography, vector art style"
- Refinement: "Make flower more defined for print, simplify to 2 solid colors"
- Result: 18KB SVG, 100% vector, printer accepted immediately
Cost Savings: $125 art fee + 1 week of production delay
Case Study 2: Event Poster for Large Format
Background:
Marketing agency designs concert poster for client in Canva at 18" × 24" size.
The Canva File:
- Photo background with filters
- Text overlays (vector)
- Graphic elements (mix of vector and effects)
- Export: 24" × 36" SVG (3.4MB)
The Problem:
Client sees printed poster mockup and requests scaling to 48" × 72" for additional locations.
The Issue:
Background photo and filter effects were created at original size. Doubling the size reveals:
- Pixelated background
- Blurry gradient effects
- Soft edges on overlays
The Solution:
Agency recreates key graphic elements in SVG AI while keeping photo in separate layer:
- Background photo sent as high-res TIFF
- All text and graphic overlays regenerated as native SVG
- Poster can now scale to any size
- Same assets used for 4' × 8' billboard version
Business Impact:
- Avoided $400 redesign fee
- Delivered billboard version 3 days faster
- Client satisfaction improved (professional result)
Case Study 3: Product Line Stickers
Background:
E-commerce brand needs die-cut stickers for product packaging (500 stickers per design, 12 designs).
Initial Approach (Canva):
- Designed 12 cute sticker designs in Canva
- Included shadows, gradients, and photo textures
- Exported as SVG for sticker printer
Sticker Printer's Response:
"These files contain embedded images and effects that cannot be die-cut. We need clean vector outlines with a cut line path. We can fix them for $45 per design ($540 total)."
The Revised Approach (SVG AI):
- Regenerated all 12 designs with prompts like: "Cute kawaii coffee cup sticker, thick outline for die-cut, flat colors, no gradients"
- Each design: 8-12KB native SVG
- Printer's response: "Perfect files, ready to print"
Cost Savings:
- $540 in art fees avoided
- 2-week production delay prevented
- Future reorders have no art fees (files are production-ready)
Ongoing Benefit:
Brand now uses AI SVG for all new sticker designs, ensuring print compatibility from the start.
The Commercial Rights Question
This is a critical but often overlooked difference between Canva and native SVG tools.
Canva's Licensing Complexity
Canva Free:
- Can use Canva-created elements for personal projects
- Commercial use requires checking individual element licenses
- Some elements are "Free" users can't use commercially
- Stock photos have specific usage restrictions
Canva Pro:
- Includes commercial usage rights for most elements
- BUT: You must verify each element's license
- Third-party elements may have restrictions
- Stock photos have download/usage limits
The Risk:
Many small business owners use Canva Free for logos, not realizing some elements prohibit commercial use. This creates legal liability if they're selling products with that logo.
SVG AI's Clear Licensing
All Plans Include:
- ✅ Full commercial usage rights
- ✅ No attribution required
- ✅ Use in client work (agencies and freelancers)
- ✅ Physical products (merchandise, packaging)
- ✅ Digital products (templates, courses)
- ✅ Unlimited usage (no per-project fees)
Why This Matters:
You generate a logo and immediately know you can:
- Put it on 10,000 t-shirts
- Use it in marketing materials
- License it to clients
- Register it as a trademark
No license checking, no legal ambiguity.
Future-Proofing Your Design Assets
When you invest time in creating brand assets, you want them to be usable for years across all mediums.
The Canva Lock-In Problem
File Dependency:
- Canva files only fully editable in Canva
- Exports are "flattened" versions
- Changing one element requires reopening Canva project
- If you cancel Canva Pro, some features become inaccessible
Version Control:
- Files stored in Canva cloud
- Limited local backup options
- If Canva changes features or pricing, you're affected
- Migration to other tools is difficult
The Native SVG Advantage
Universal Compatibility:
- SVG is an open standard (W3C specification)
- Any vector editor can open and edit SVG files
- Files work in 2025, will work in 2035
- Not dependent on any single company
Complete Control:
- Files are stored locally or in your own cloud
- Can be version-controlled with Git
- Editable in Adobe Illustrator, Inkscape, Figma, etc.
- Production Ready code that any print shop accepts
Conclusion
Canva is a fantastic tool for what it was designed for: quick, beautiful social media graphics and digital content. It has democratized design for millions of users, and that's genuinely valuable.
But Canva is not a specialized vector factory. If you are serious about print production, merchandise manufacturing, or building brand assets that need to work across all mediums at all sizes, you need tools that speak the language of professional printing.
Use the AI SVG Creator that guarantees native vector output. Your printer will thank you with faster turnaround, zero art fees, and professional results that scale from business cards to billboards.
The difference between a "looks good on screen" design and a "print-ready professional asset" is the difference between a file that costs you money in art fees and delays, and a file that saves you hundreds of dollars per project while delivering superior quality.