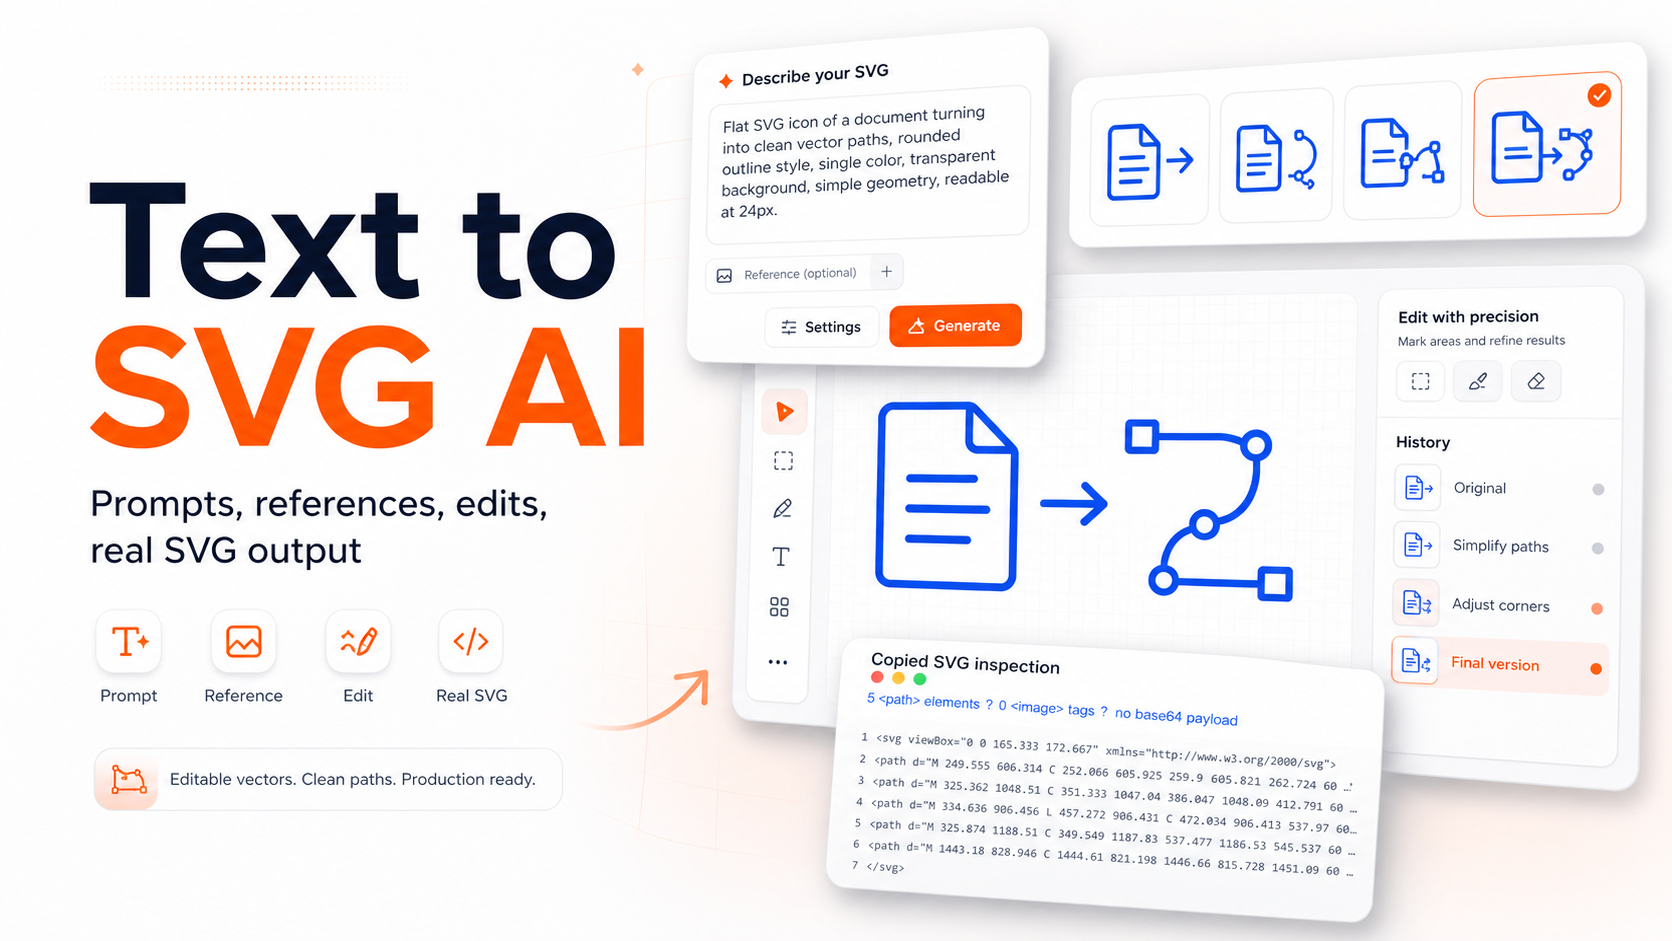
Quick answer. Text-to-SVG AI is the practical workflow of describing an asset, generating editable SVG options, refining the strongest result, and checking that the download is real vector markup. A useful text to SVG AI tool should support prompts, reference images, multiple variations, edits, SVG download, and SVG code inspection.
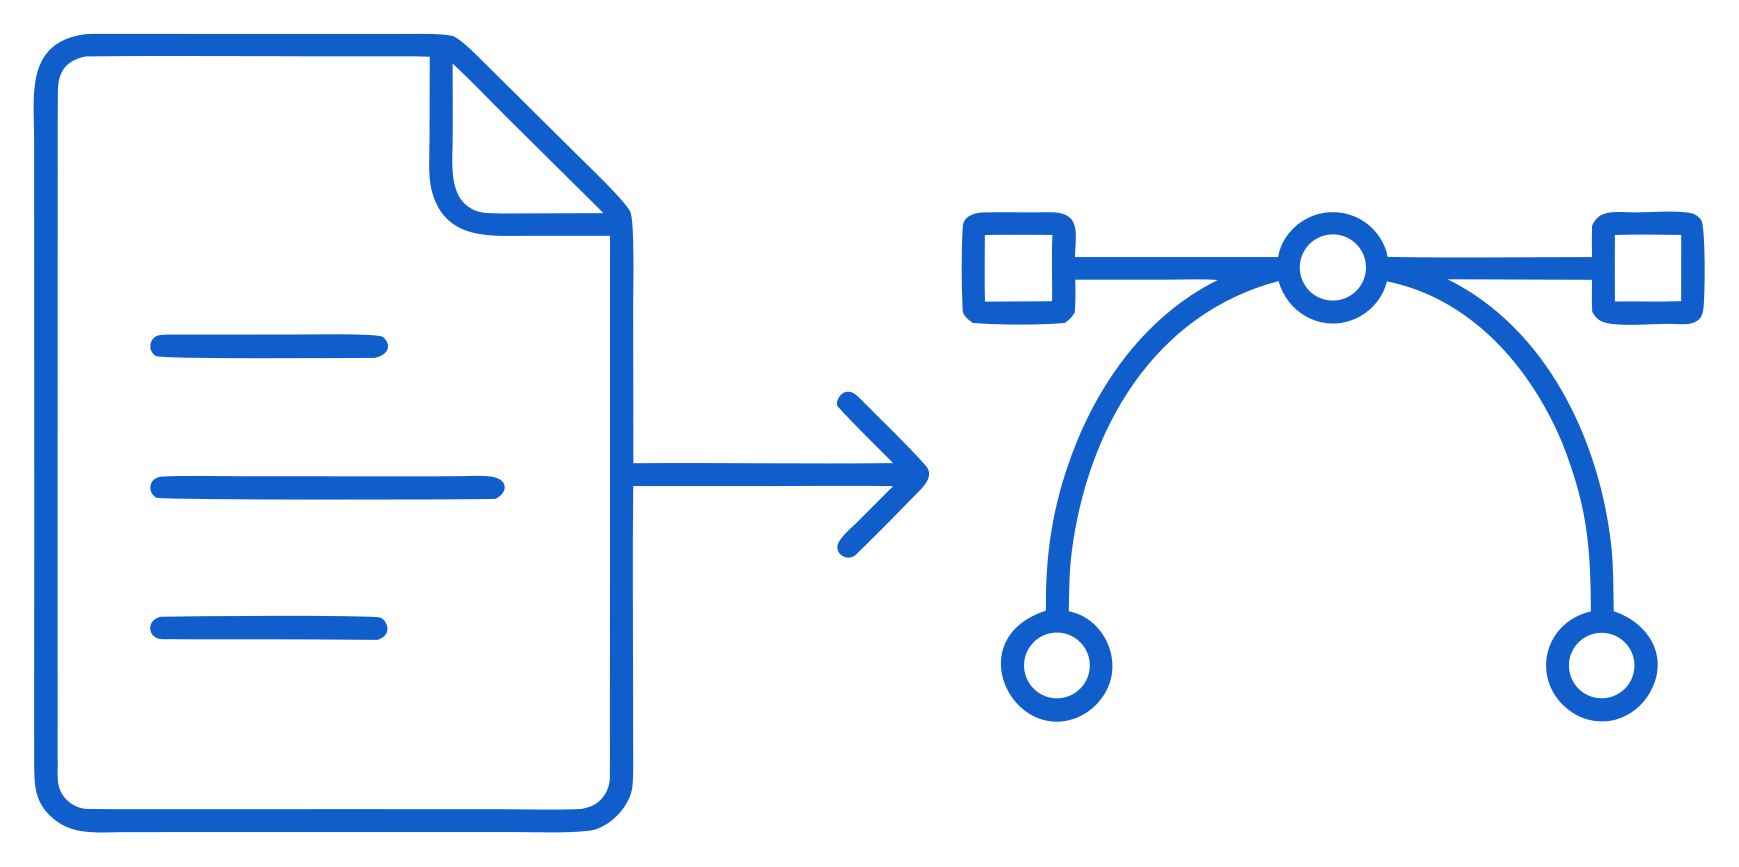
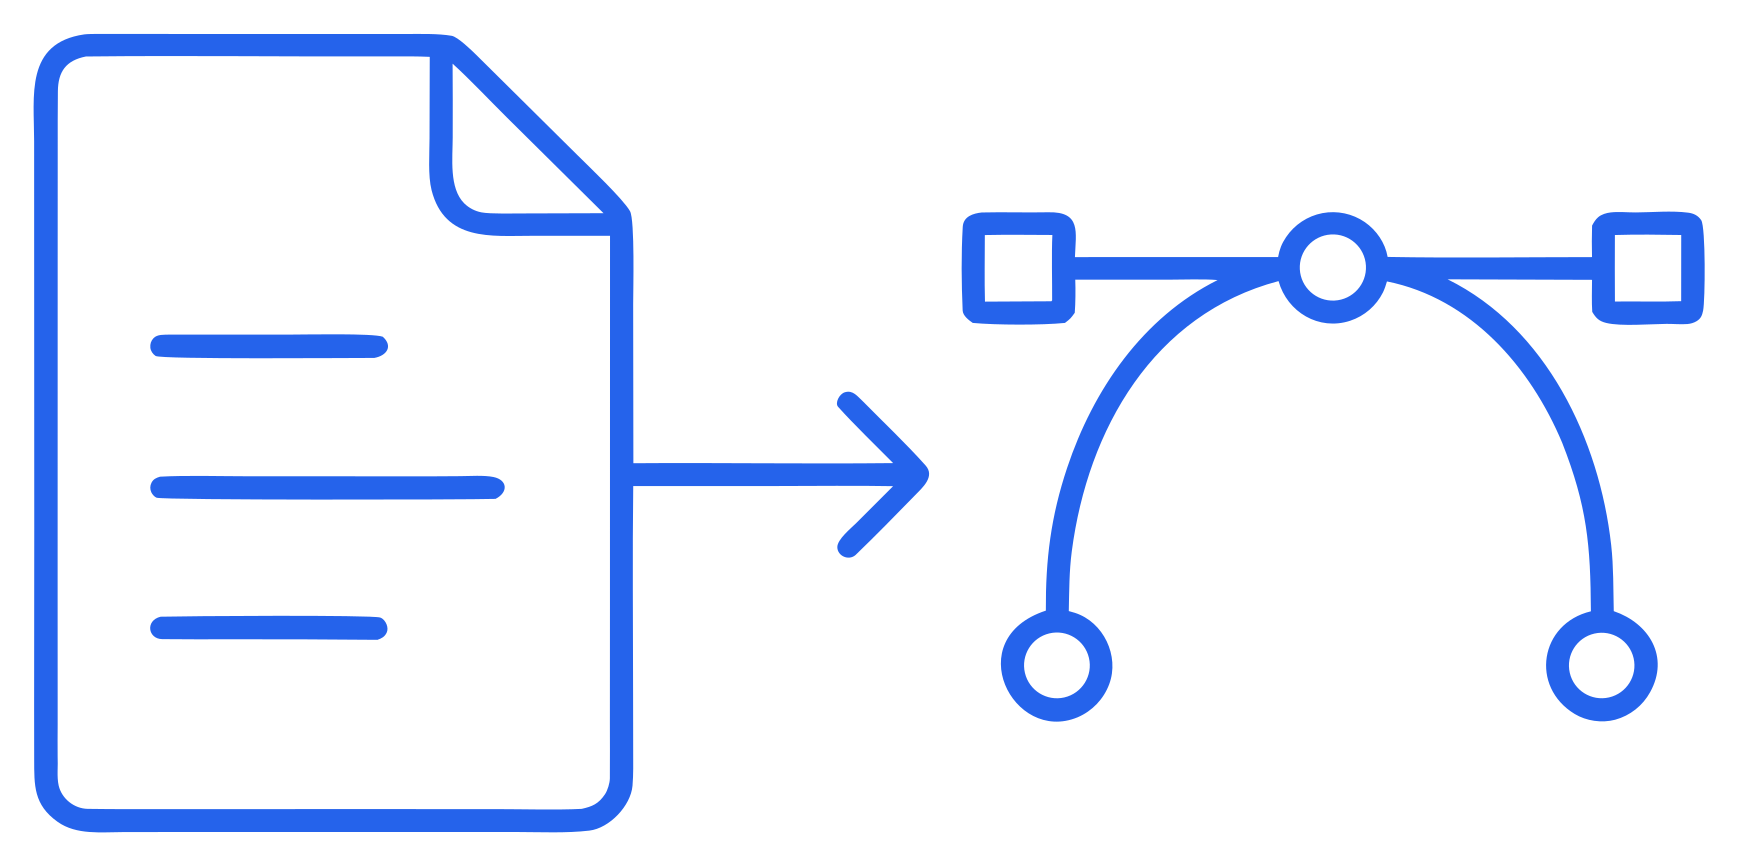
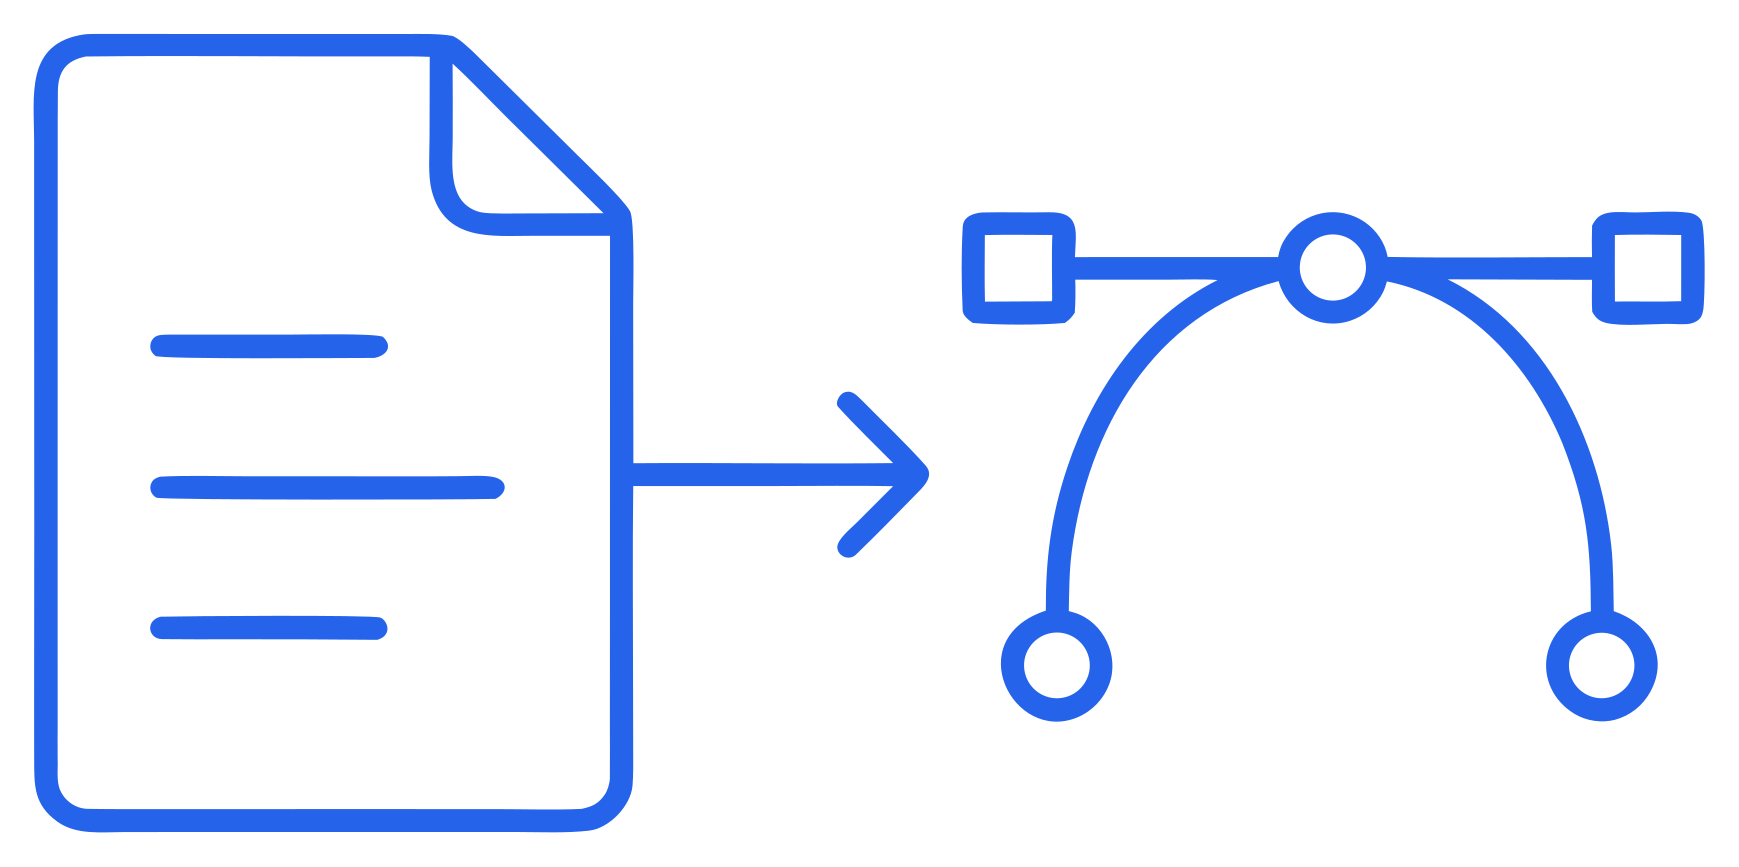
About the example. I built SVG AI. This walkthrough follows a document-to-vector icon created in May 2026. You can download its original SVG and a manually edited version with the requested blue color and corrected proportions.
Updated September 5, 2026. The dashboard walkthrough and its screenshots below were captured May 18, 2026.
The phrase text to SVG can mean a few different things. A developer might want SVG markup that displays a word. A designer might want lettering converted to outlines. A founder might type a prompt like "minimal blue upload icon" and expect a usable SVG file for a product UI.
This guide follows an icon from prompt to SVG file, including settings, variations, references, AI edits, and manual corrections.
In this article
- What text to SVG means in 2026
- Choose the right starting point
- Walkthrough: generate an SVG from a text prompt
- Compare variations and choose the best result
- Use a reference image when words are not enough
- Refine an SVG without starting over
- Prompt templates by use case
- How to inspect the downloaded SVG
- When AI should not be the final step
- Related SVG AI guides
- Frequently asked questions
What Text To SVG Means In 2026
Text-to-SVG is not one task. It is a set of workflows that end in an SVG file.
| User intent | Input | Expected output | Best tool category |
|---|
| Prompt-to-SVG graphic | A written prompt like "minimal blue document icon" | A new icon, logo, badge, sticker, illustration, or web graphic | AI SVG generator |
| Text plus reference image | A prompt plus a sketch, old logo, screenshot, or style reference | A new SVG guided by the uploaded image | AI SVG generator with references |
| Typography-to-SVG | Actual letters or words | SVG text elements or outlined letter paths | Figma, Illustrator, Inkscape, or code |
| Raster-to-SVG conversion | PNG, JPG, scan, screenshot, or logo image | Traced vector paths | Image-to-SVG converter |
| Code-to-SVG | Data, JSX, HTML, chart logic, or shape math | SVG markup generated by code | React, D3, Satori, or SVG libraries |
Choose the right starting point
Choose your input based on what you need to create and which details must stay exact:
| Your starting point | First action | Stop and check |
|---|
| An idea for new artwork | Create SVG artwork from a text prompt | Does the preview communicate the requested subject? |
| Exact words such as NORTH | Use SVG text or a vector editor | Does the intended font load, and are the letters exact? |
| A sketch that can change | Attach it as a reference with a short transformation prompt | Did the model change geometry you needed to keep? |
| A finished raster logo to preserve | Use the image to SVG converter | Compare the trace with the source, including counters and small gaps. |
<svg xmlns="http://www.w3.org/2000/svg" viewBox="0 0 280 72">
  <text x="12" y="52" fill="#14532D" font-family="Arial, sans-serif"
        font-size="48" font-weight="700" letter-spacing="2">NORTH</text>
</svg>
Walkthrough: Generate An SVG From A Text Prompt
For the live example, I created a clean SVG AI project and used this prompt:
Flat SVG icon of a document turning into clean vector paths, for a developer tool sidebar, rounded outline style, single color #2563EB, transparent background, simple geometry, readable at 24px.
This is a strong text-to-SVG prompt because it gives the tool the same information a designer would need:
| Prompt detail | Why it helps |
|---|
Flat SVG icon | Names the asset type and expected output. |
document turning into clean vector paths | Defines the subject and metaphor. |
developer tool sidebar | Gives a realistic use case and display context. |
rounded outline style | Limits the visual language. |
single color #2563EB | Specifies a color to check in the output. |
transparent background | Requests an asset that can sit on the page background. |
readable at 24px | States the display size to use when judging detail. |
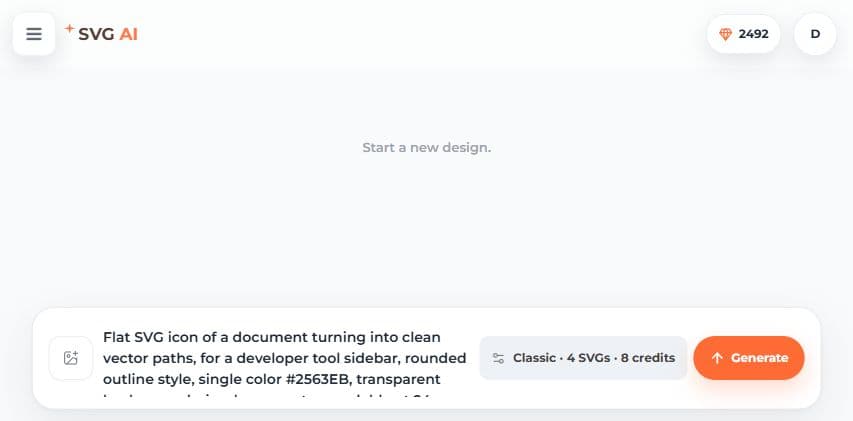 The May walkthrough used Classic, 4 SVGs, Default ratio, and Transparent background. For your first attempt, one variation is a useful starting point. The composer displays its credit cost before generation. Sign up to get starter credits; SVG downloads require paid access through an eligible subscription or credit purchase.
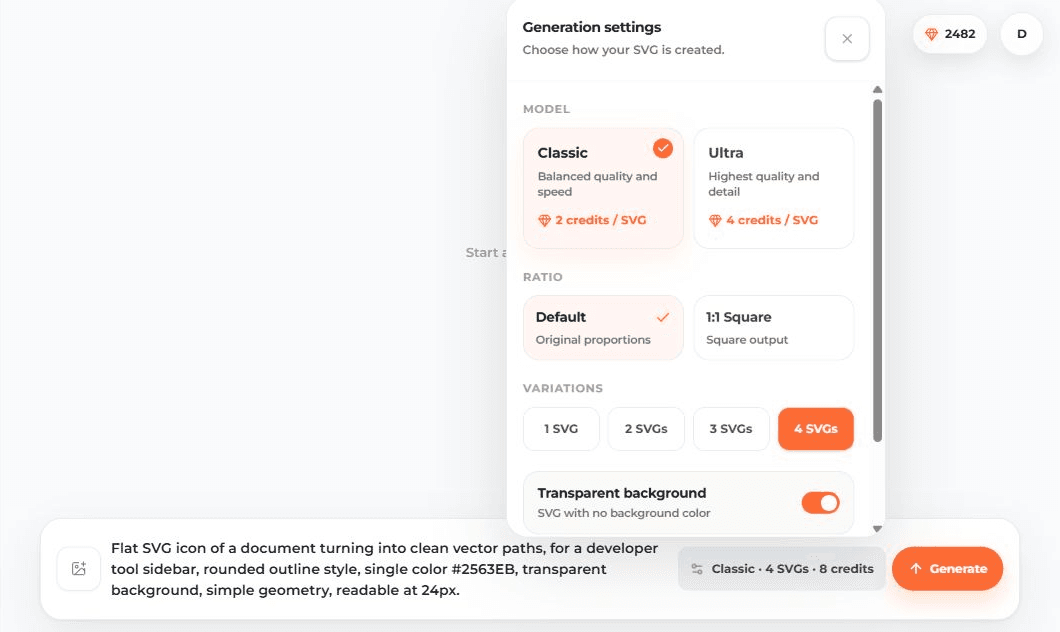 Classic is the starting mode for this walkthrough. Ultra offers another option for more detailed work; compare the mode descriptions and displayed credit cost when choosing.
Use 1 SVG when the prompt is narrow and you already know the direction. Use 4 SVGs when you want to compare composition, shape, and icon readability before editing.
Classic is the starting mode for this walkthrough. Ultra offers another option for more detailed work; compare the mode descriptions and displayed credit cost when choosing.
Use 1 SVG when the prompt is narrow and you already know the direction. Use 4 SVGs when you want to compare composition, shape, and icon readability before editing.
Compare Variations And Choose The Best Result
The prompt produced four SVG options. This is where text-to-SVG becomes more useful than a single-shot prompt.
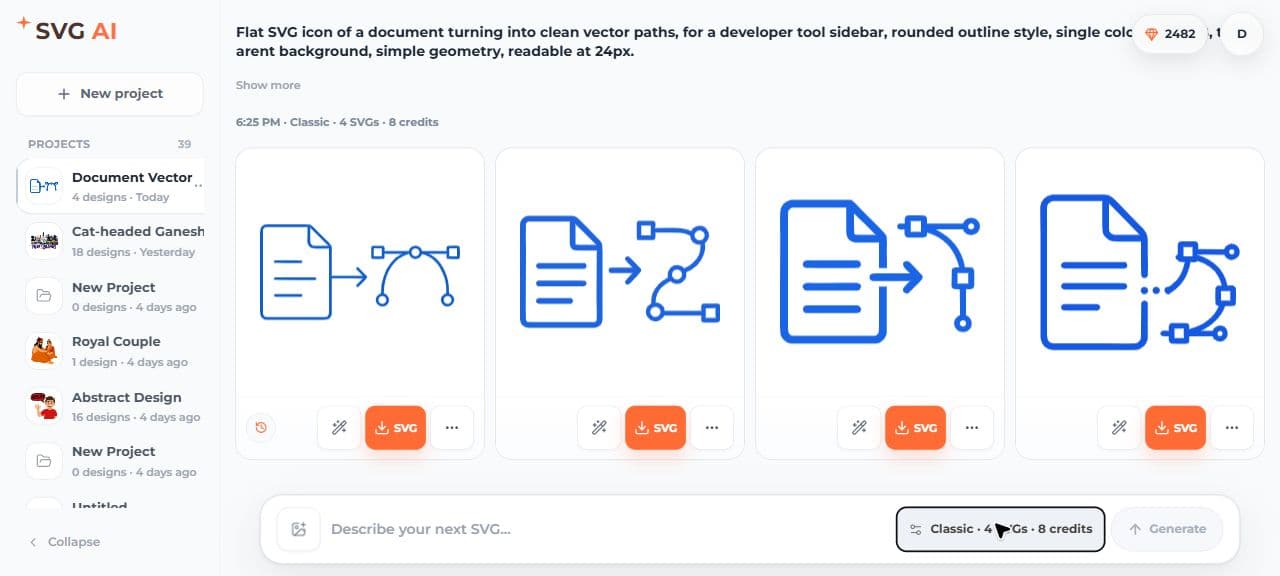 When comparing SVG variations, do not only pick the prettiest preview. Judge the asset against the job it has to do.
| Check | What to look for |
|---|
| Subject clarity | Can a viewer recognize the document and vector-path idea quickly? |
| Small-size readability | Would the icon still work at 24px, 32px, or 48px? |
| Shape simplicity | Are the forms simple enough to edit later? |
| Color discipline | Did it stay close to the requested single-color direction? |
| Background | Is the result transparent rather than locked to a canvas? |
| Output usefulness | Can you download or copy it as SVG code? |
 The result cards also expose the production actions that matter after generation: edit the SVG, download the SVG, add the design back into the prompt as a reference, copy SVG code, zoom the preview, or show the grid.
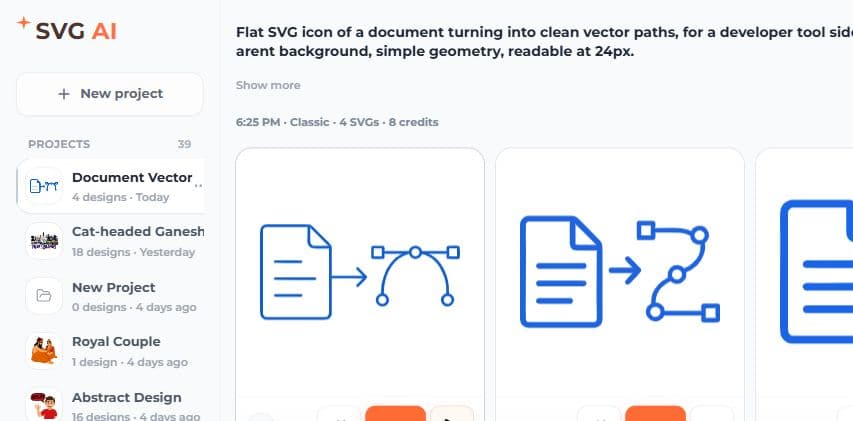 Use these controls in the AI SVG generator to save a promising result, reuse it as a reference, or make a focused revision.
Use A Reference Image When Words Are Not Enough
Text-only prompts are best when you are inventing something new. References are better when you already have visual context.
Use a reference image to communicate:
| Reference need | Example |
|---|
| Shape | A rough sketch of an icon or badge. |
| Brand direction | An existing logo, color palette, or mark. |
| Layout | A screenshot or product UI region. |
| Subject detail | A product photo or object silhouette. |
| Prior work | A previous generated design that you want to adapt. |
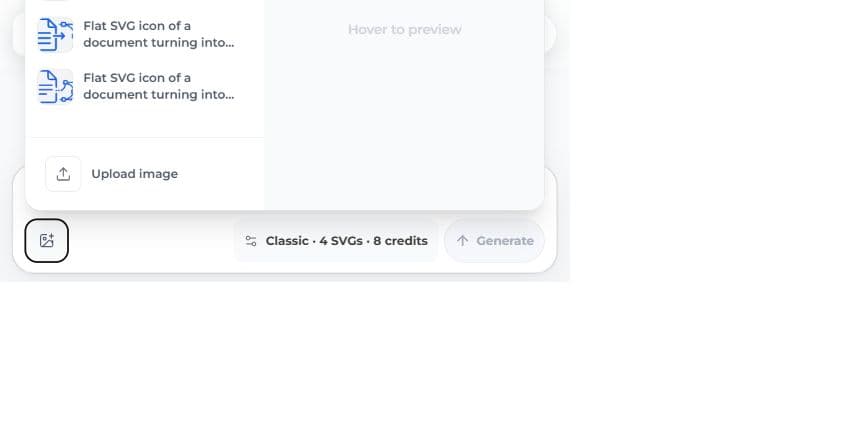 A good reference-guided prompt still needs clear instructions. The image carries visual context, but the prompt tells SVG AI what to preserve, simplify, or change.
Use the uploaded sketch as reference. Keep the shield shape and checkmark idea, simplify the geometry, use navy #1E3A8A, transparent background, return an editable SVG icon.
If your goal is direct conversion of a PNG, JPG, screenshot, or logo image into SVG, use the dedicated image to SVG converter path. If your goal is to create a new SVG inspired by an image, use the image as a reference and describe the transformation.
What to compare after an AI edit
In a separate September example, the FlowMint brief requested a navy shield with a mint leaf, followed by an edit to make only the leaf orange. Compare the generated source and AI revision: the leaf became orange, but the shapes and framing changed too. Check the entire result after each edit. See the prompts and logo placement for a manual alternative that preserves the original shapes.
Refine An SVG Without Starting Over
The first result is often a strong direction, not the final asset. For the walkthrough, I opened one icon in the editor.
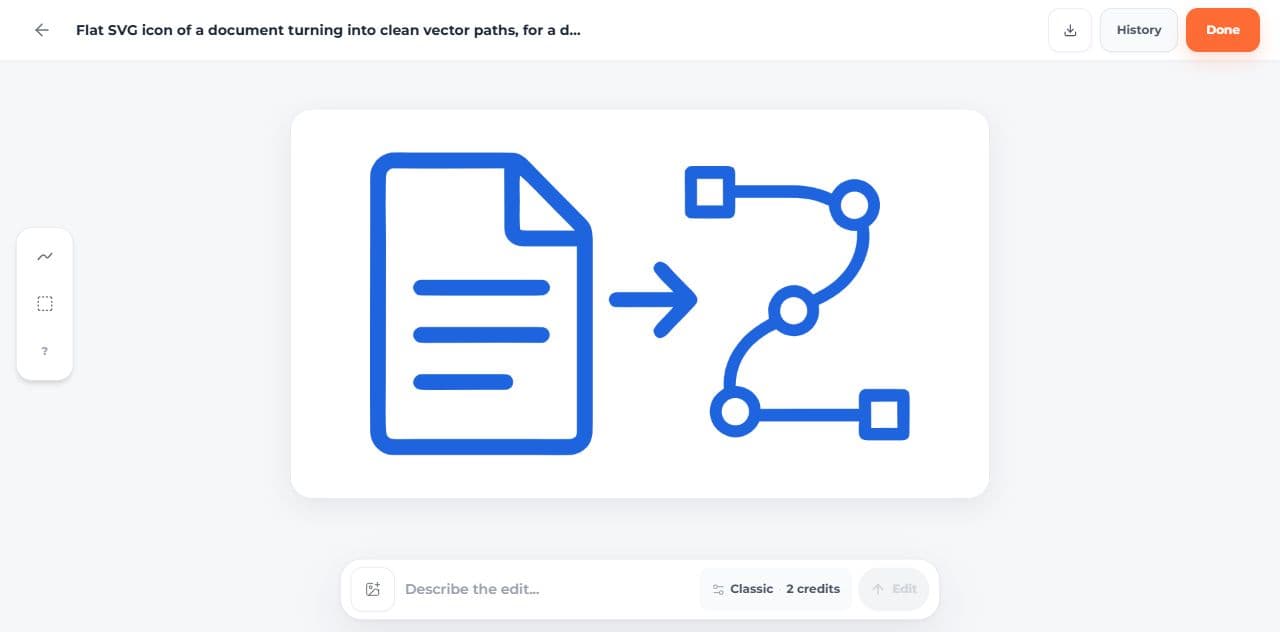 The editor supports two kinds of guidance. Marking an area helps communicate the requested change, but you should still compare the whole result afterward:
| Edit method | Use it when |
|---|
| Prompt edit | The whole design needs a style, color, detail, or composition change. |
| Marked-area edit | Only one part of the SVG needs attention. |
Make this icon thinner and more minimal. Keep the same subject, same blue color, and transparent background.
That is better than saying "make it better." It tells the editor what to change and what not to change.
The history panel is where version review happens after edits. This matters for SVG work because you may want to compare a cleaner edited direction against the original before committing.
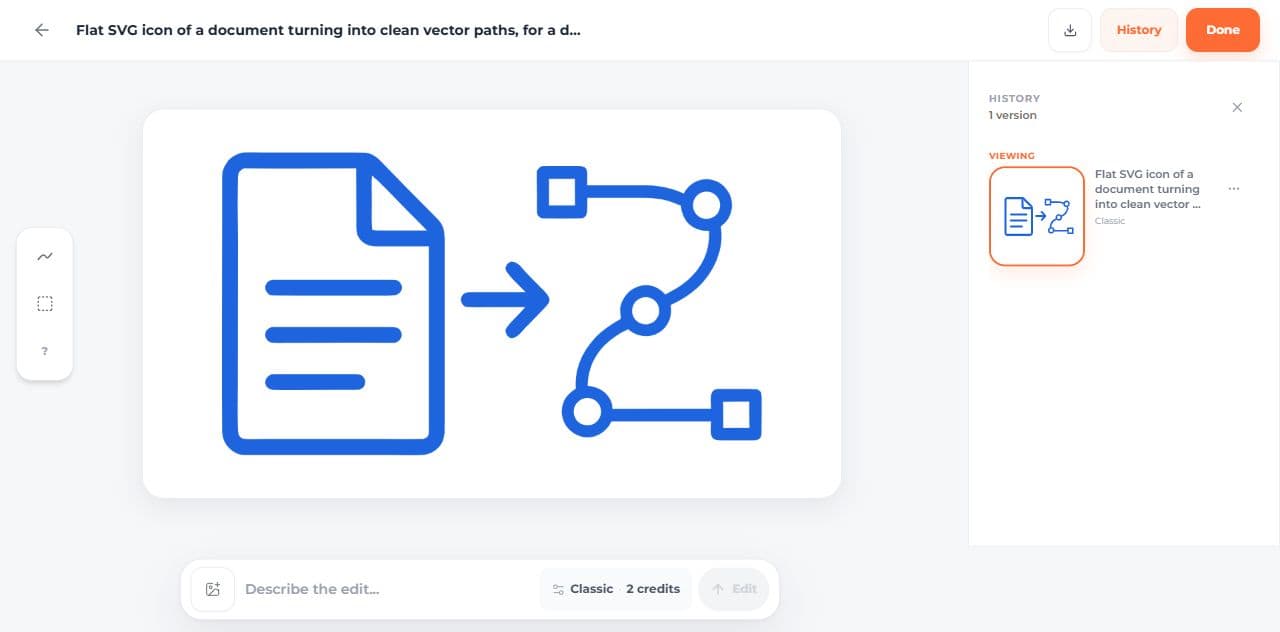 Use edits for small and medium changes:
| Good edit request | Why it works |
|---|
| "Make the stroke thinner and keep the same color." | Specific style change, clear constraint. |
| "Simplify the badge into fewer shapes for cutting." | Ties the edit to production use. |
| "Remove the extra sparkles, keep only the main icon." | Clear removal request. |
| "Make the logo mark more symmetrical." | Direct composition request. |
Prompt Templates By Use Case
The best text-to-SVG prompts are specific about the asset's job. Start with this pattern:
[Asset type] of [subject] for [use case], [style], [colors], [composition], [background], [SVG constraint].
Icon Prompt
Flat vector icon of a cloud upload symbol for a SaaS dashboard, rounded outline style, single color #2563EB, transparent background, simple paths, readable at 24px.
Why it works: it names the asset type, product context, style, color, background, and target size.
Logo Prompt
Minimal SVG logo for a climate analytics startup called Northgrid, abstract compass mark made from four simple leaf shapes, dark green #14532D and lime #84CC16, modern SaaS feel, transparent background, no mockup.
Why it works: it gives a brand context, mark idea, color palette, and avoids mockup-style output.
Sticker Or Cut-File Prompt
Single-color SVG sticker badge that says BETA, bold block lettering, simple orbit line around the word, no gradients, no shadows, transparent background, clean paths for cutting.
Why it works: it tells the tool the file may be used for cutting, so simple shapes matter more than rich decoration.
Note: exact lettering can still need manual review. For Cricut, Silhouette, laser cutting, or vinyl work, inspect the paths before production.
Illustration Prompt
Flat SVG illustration of a small robot organizing colorful folders, friendly startup style, simple geometric shapes, limited palette of blue, yellow, and coral, transparent background, suitable for a documentation page.
Why it works: it allows more detail than an icon prompt, but still keeps the output tied to an SVG-friendly style.
Reference-Guided Prompt
Use the uploaded product screenshot as reference. Create a simplified SVG illustration of the main workflow, keep the same three-step layout, remove small UI text, use blue and orange accents, transparent background.
Why it works: it tells SVG AI what to preserve from the reference and what to simplify.
Edit Prompt
Make this icon thinner and more minimal. Keep the same subject, same blue color, and transparent background.
Why it helps: it names one change and specifies which details should stay the same. Compare the revision with the original to see whether those details were preserved.
How To Inspect The Downloaded SVG
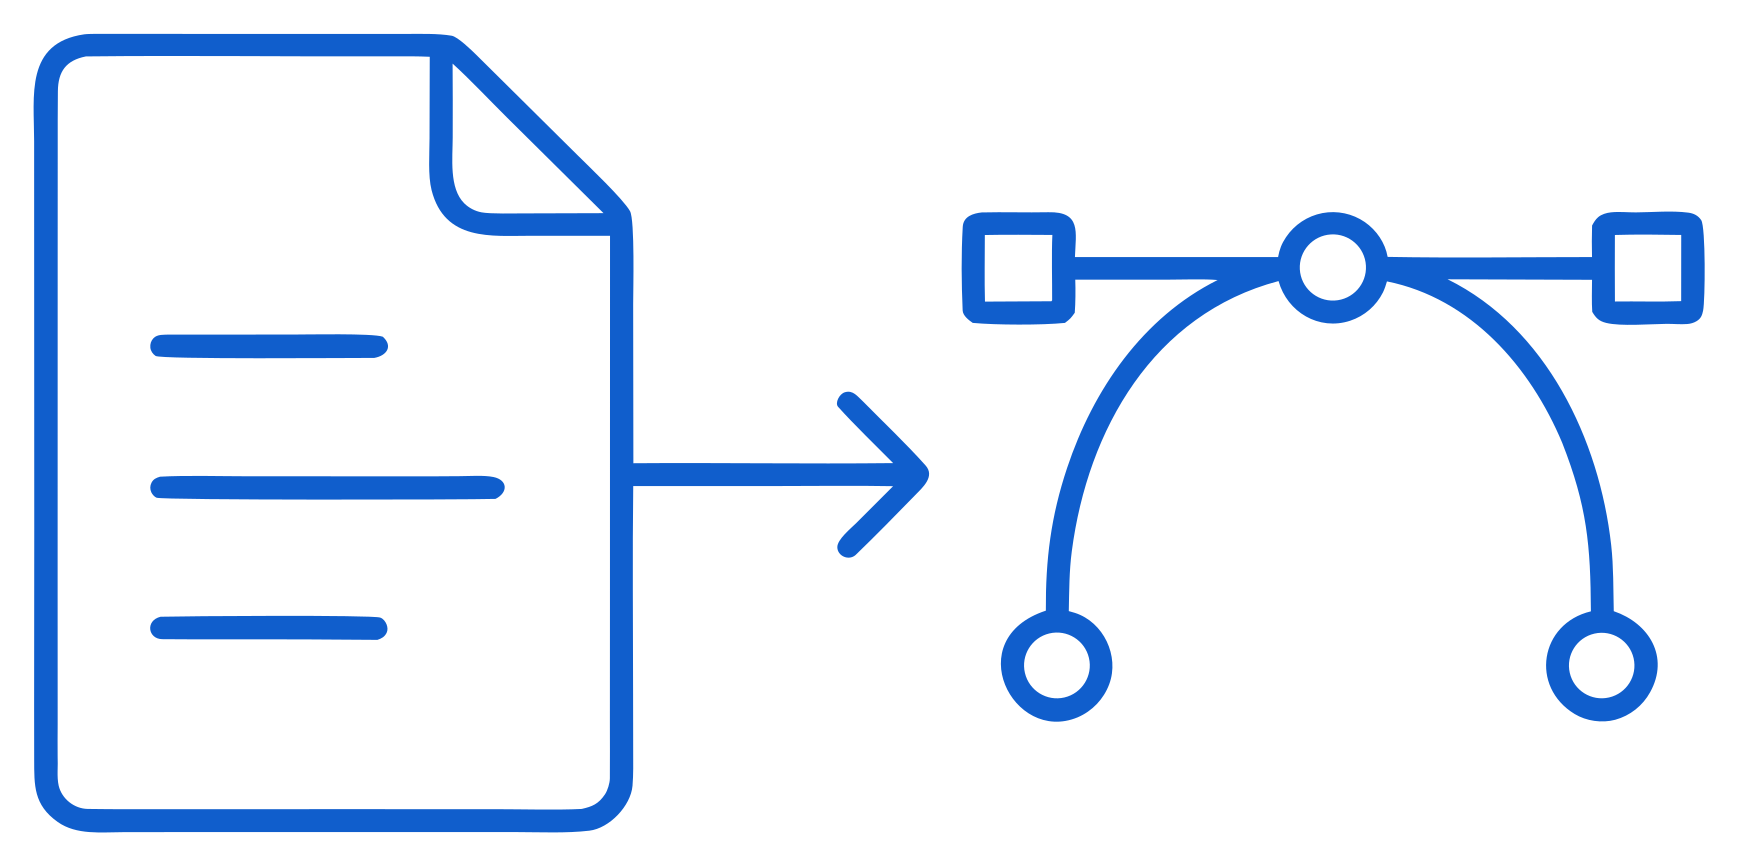
After generating the example icon, I copied the SVG code from the result action menu and inspected the output.
The copied file:
- started with an
<svg> element
- included 5
<path> elements
- included 0
<image> elements
- included no base64 raster payload
This file contains editable vector paths. The next step is to check its colors, proportions, and readability at the intended display size.
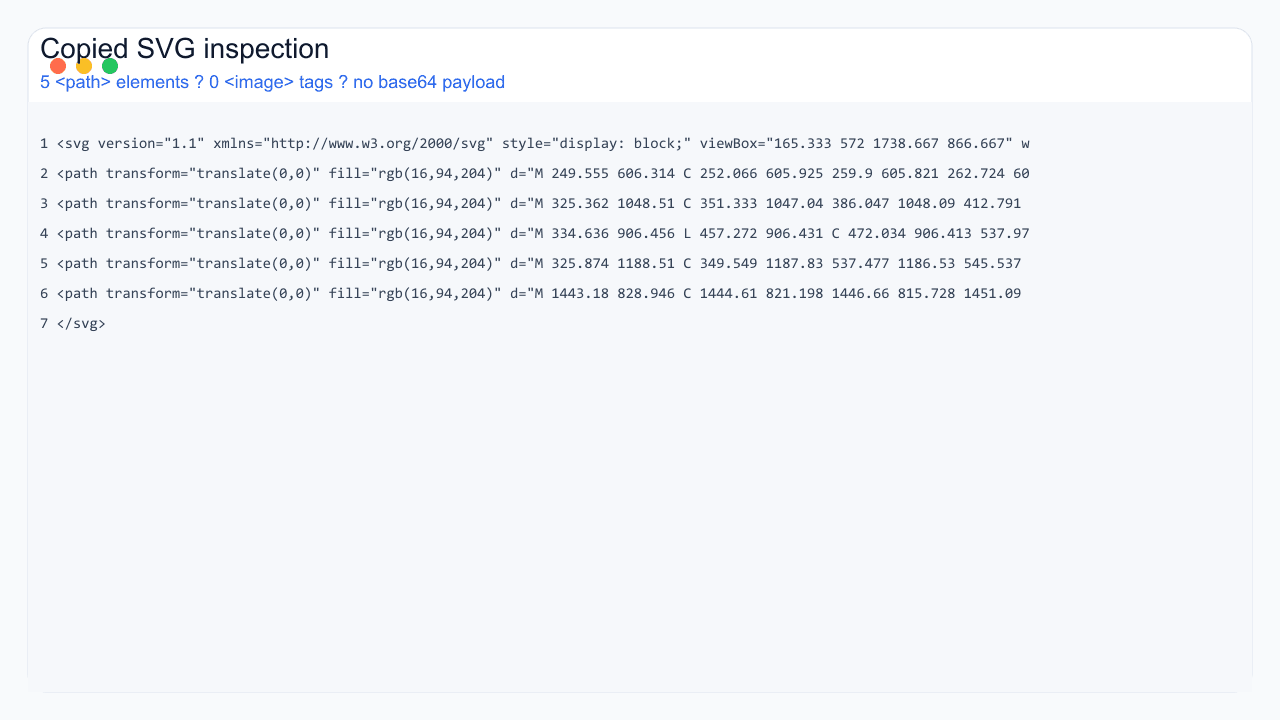 Open the complete original document-to-vector SVG to follow the editing steps below.
A reproducible manual finish
The source has a wide viewBox, preserveAspectRatio="none", and a fill of rgb(16,94,204). The prompt asked for #2563EB; those are different colors. Setting a square width and height with the original aspect-ratio rule can also distort the drawing.
Open the manually finished SVG. The only changes are:
preserveAspectRatio="none" → preserveAspectRatio="xMidYMid meet"
fill="rgb(16,94,204)" → fill="#2563EB" (on each of the five paths)
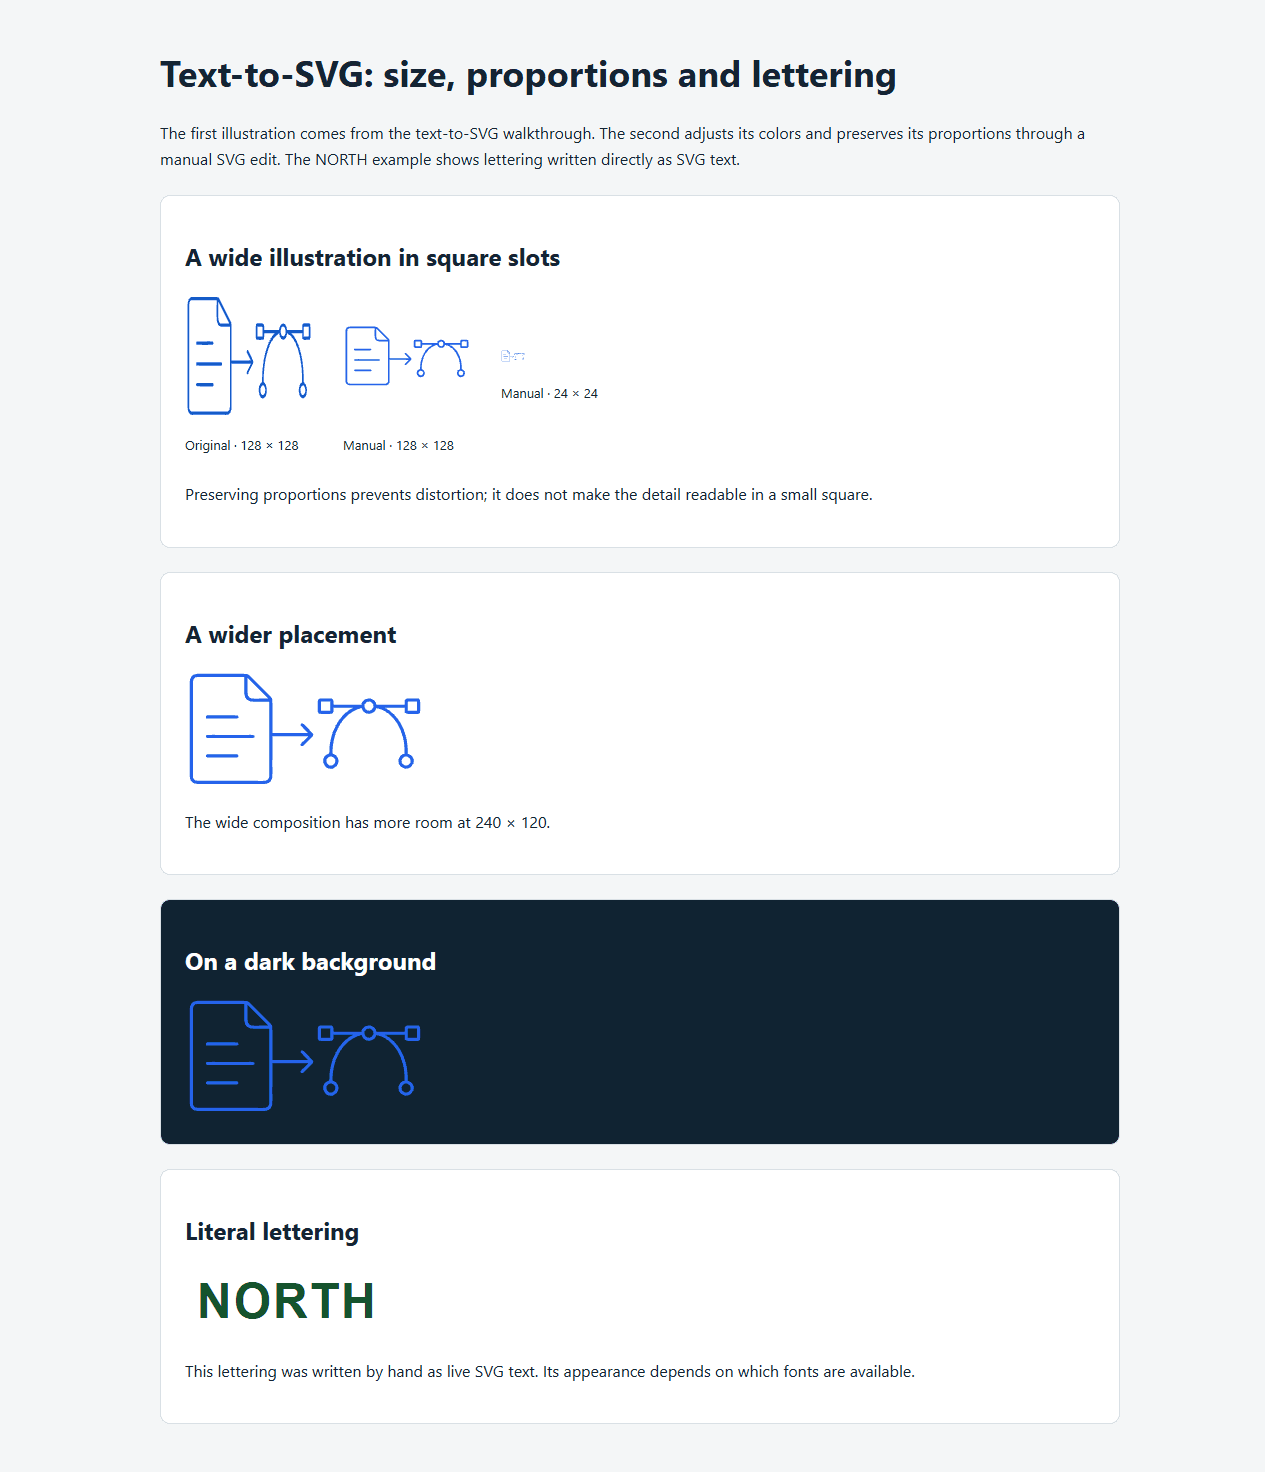
All path coordinates remain unchanged. This corrects the exact color and prevents stretching into a square slot. It does not turn a wide composition into a good small square icon: the drawing will fit inside the slot with empty space. Use the original composition at a wider display size, or simplify the subject for a sidebar. That is a concrete reason to inspect the full file instead of trusting the prompt or preview alone.
 Open the placement comparison to see both versions in square and wide slots. Preserving proportions avoids stretching, but the 24px square still compresses the details. The wider 240 × 120 placement gives the document-to-path composition room to read.
 Use this quick inspection checklist:
| Check | Good sign | Warning sign |
|---|
| SVG root | File starts with <svg | File is actually PNG/JPG despite extension |
| Vector elements | Contains path, circle, rect, polygon, line, or text | Mostly one <image> tag |
| Raster payload | No base64 image block | Long data:image/png;base64... string |
| Editability | Shapes can be selected in a vector editor | Entire artwork behaves like one flat bitmap |
| Size behavior | Scales cleanly | Looks blurry when enlarged |
When AI Should Not Be The Final Step
Text-to-SVG AI is useful for moving from idea to editable asset quickly. It is not always the final authority.
Use a designer or vector editor for the final review when:
- the logo will become a legal trademark
- exact typography is required
- the diagram needs technical accuracy
- every path count, stroke width, or node position matters
For cutters, engravers, printers, and brand systems, SVG AI can still be part of the workflow. The practical step is to inspect the final SVG against the production requirement: closed paths, stroke widths, fills, color separations, spacing rules, or whatever the machine, vendor, or brand guide expects.
The practical workflow is not "AI replaces design." It is "AI gets you to a workable SVG faster, then you inspect and refine the parts that matter."
If you are comparing tools, see our AI SVG generator comparison for workflows, example results, and export options.
If budget is the constraint, read the free SVG generators guide.
If you are new to AI SVG workflows, the beginner's guide to generating SVGs with AI is a gentler starting point.
If you want a narrower execution walkthrough, use the step-by-step text to SVG AI tutorial to build a matching SVG icon set from prompts.
If you are starting from an existing PNG, JPG, screenshot, or logo image, use the image to SVG converter.
Frequently Asked Questions
What Is Text To SVG AI?
Text-to-SVG AI is a workflow where you describe a visual asset in words and an AI tool creates an editable SVG file. The most common use cases are icons, logos, badges, illustrations, stickers, and web graphics.
Is Text To SVG The Same As Turning Letters Into SVG?
No. Generating artwork from a written prompt is different from placing letters in an SVG. Use SVG text or a vector editor when you need exact words, fonts, and letter spacing.
Can SVG AI Generate Multiple SVGs From One Prompt?
Yes. SVG AI can generate 1, 2, 3, or 4 SVGs from one prompt. More variations are useful when you are comparing logo, icon, badge, or illustration directions.
Should I Use Classic Or Ultra?
Start with one variation in the mode that fits your task and balance. Read the total credit cost displayed before each generation or edit.
Do I Need A Reference Image?
No. Text-only prompts work well when you are creating a new idea. Add a reference when shape, brand context, layout, or visual style matters.
Can I Edit The SVG After Generating It?
Yes. Open a result in the editor, describe the change, and use marked areas when the edit should affect only part of the design. SVG AI keeps prior versions so you can compare the original and edited result.
How Do I Know If The SVG Is Real Vector Output?
Copy or open the SVG code. Look for vector elements like path, circle, rect, polygon, or text. If the file mainly contains an <image> tag with a base64 payload, it is probably a raster image inside an SVG wrapper.
Is Text To SVG AI Good Enough For Production?
It can be, especially for icons, web graphics, stickers, concept logos, and illustrations. For trademarks, strict brand systems, exact lettering, cutting machines, and regulated diagrams, inspect and refine the SVG before final use.